
Hot Water Cylinder Maintenance: Pete’s Guide to Keeping Your System Healthy

Table of Contents
Most Kiwis don’t think twice about their hot water cylinder until they’re hit with a freezing cold shower. Tucked away in a hallway cupboard or mounted outside, cylinders are pretty low-maintenance units—but “low maintenance” doesn’t mean zero maintenance.
Spending 10 minutes once or twice a year on basic checks can save you thousands in premature tank replacements, prevent water damage, and keep your power bills down.
Here is my straightforward, step-by-step checklist to keep your hot water cylinder running smoothly for years to come.
1. The 30-Second Visual Check (Every Few Months)
Pop open your hot water cupboard—or head outside if you have an exterior unit—and look for early warning signs:
Check for Drips: Look around the base of the tank, the element cover plate, and the pipe connections near the top. Small mineral crusts or rust spots usually mean a valve washer or fitting is weeping.
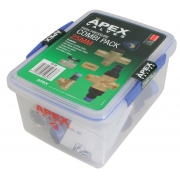
Inspect Outdoor Insulation: If your cylinder is outside, ensure the pipe lagging and insulated valve covers (like an Apex pack) are intact and haven’t been torn or degraded by UV light.
Listen closely: A noisy, rumbling tank when heating is usually a sign of heavy mineral scale sitting over the element.
2. Testing Your Pressure Relief (TPR) Valve (Twice a Year)
Your Temperature-Pressure Relief (TPR) valve is the most critical safety device on your cylinder. It releases excess pressure so your tank doesn’t over-pressurise.
How to test it:
Locate the TPR valve (usually near the top of the cylinder with a small drain pipe running outside or into a tundish).
Gently lift the test lever for a couple of seconds, then let it snap back down.
You should hear a short burst of water discharge through the drain pipe.
What to watch out for: If water keeps trickling out of the drain pipe after you let go, the valve seal has seized or got grit stuck in it. Lift the lever once more to try and flush it clean. If it still drips, it needs to be replaced by a plumber.
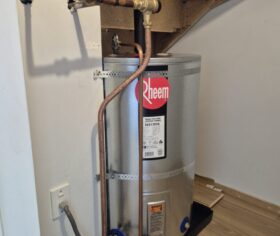
3. Flushing Tank Sediment (Once a Year)
Over time, minerals and grit from your local water supply settle at the bottom of the cylinder. This layer of sludge acts as an insulator between the heating element and the water, forcing your element to work twice as hard to heat the tank.
How to flush your tank:
Turn off the power first: Switch off the cylinder at your main fuse board or the local wall switch. Never drain a tank with the power live—you will burn out the heating element instantly.
Connect a garden hose to the drain valve at the very bottom of the cylinder and run the other end to a drain or outside.
Open a hot tap inside the house (this vents air into the system so the tank can drain).
Open the drain valve and let 15–20 litres (a couple of buckets’ worth) run out until the water runs clear.
Close the drain valve, turn off the hot tap, let the cylinder completely refill with water, and only then switch the power back on.
If you live in a hard-water area (like parts of Canterbury or Hawkes Bay), do this every 6 months to prevent heavy scale build-up.
4. Thermostat & Tempering Valve Setup
Keep the Storage Temperature at 60°C: Your cylinder thermostat should always be set to at least 60°C to kill off Legionella bacteria. Never turn down your main thermostat to lower your tap temperature.
Check Your Tap Temp: Under NZ Building Code (G12/AS1), hot water to bathroom taps should be tempered down to 50°C to prevent scalding. If your shower is running dangerously hot or lukewarm, your tempering valve (the mixing valve on the hot pipe output) may need an adjustment or service.
What You Can Do vs. When to Call a Plumber
DIY Friendly:
Visual leak checks and pipe insulation maintenance.
Testing the TPR valve lever.
Flushing bottom sediment out through the drain hose.
Call a Qualified Plumber / Electrician:
Replacing electrical heating elements or main thermostats.
Servicing or replacing seized TPR and expansion valves.
Inspecting or replacing internal sacrificial anode rods (in enamel-lined steel tanks).
Fixing any leak coming directly from the tank body itself.
Need a Hand with Your Cylinder?
If your cylinder is leaking, making strange noises, or just hasn’t been looked at in a decade, give The Cylinder Guy team a call on 0800 234 800. We can run a full system health check to make sure your setup is safe, efficient, and built to last.